Embryo 4D microscopy mounting
Contributed by Ian Chin-Sang, Queens University, ON, Canada
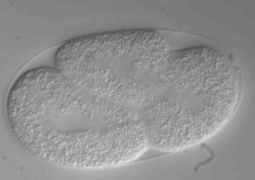
Embryo 4D video Microscopy preparation of slides and embryos.
Perform the following steps in order. Have all the materials ready and on hand and try to be quick as possible.
Before you start dissecting out the embryos make sure that you log on to the microscope computer and that the microscope and camera are on.
Method
- Prepare 50-100ml of 3.5% agarose (the one used for DNA electrophoresis) in distilled water. This concentration works the best for me. Other labs use agar. Dissolve the agarose by heating 2-3 times for at most 30 sec in the microwave. Don’t allow it to overflow. Distribute about 2-5 ml in 10 ml test tubes. Seal the tubes with parafilm and keep them in the fridge until use.
- Melt the agarose by heating it directly in the flame, and try not to burn it. You can keep the agarose fluid in the heating block set up at about 50-60oC for 24h.
- Fill a well of a the spot plate (made of glass) with about 100 ul M9 and place about 10 gravid hermaphrodites in it.
- Prepare the pad: Stick a 0.1mm thick tape (paper tape) along a slide. Make one more and use them as spacers. Place a third slide in parallel between the spacer slides. With a Pasteur pipette spot a drop of agarose in the middle of the third plate (the one without the tape). Flatten the agarose by dropping immediately a fourth slide perpendicularly over the other 3 slides. Do not press. Wait 15-30 seconds to cast and gently slid out the underneath slide with the pad. The pad should be smooth. From this step you should be relatively quick. Don’t allow the pad to dry out.
This step is also described in Ledwich D et al., Methods in Enzymology, vol. 322, 76-88.
- With a thin needle (27G1/2) cut the worms in the middle of the body under dissecting scope trying to avoid the zones of the gonad with 1-2 cell embryos. The embryos will pop out from the mother. Using a mouth pipette (Sima-Aldrich Cat# A5177 Aspirator tube assemblies for calibrated microcapillary pipettes) and a drawn out microcapillary suck the embryos together with a little M9 and place them on the agarose pad. Remove most of the excess M9 by sucking with the mouth pipette, and cover the pad with a 22x22 coverslip. However, the M9 should cover the whole pad. Remove the remaining excess M9 with a paper towel inserted between the coverslip and the slide up to the pad. Try to remove all excess M9 or the recording embryo will become out of focus in time.
- Seal with immersion oil. Put 1-2 drops of immersion oil at the edge of the coverslip. It will diffuse under the coverslip and completely surround the pad. If it is necessary add one more drop of oil. Use of immersion oil instead of vaseline for sealing has the advantage that it does not mess up your optics. I use cheaper immersion oil for sealing and keep the Zeiss oil only for immersion optics.
- Mount the slide under the microscope. With 10x optics find a 1-2 cell stage embryo, and then switch to 60x. Take 10-12 focal planes at 2-2.2mm distance, for 8h (see below)
References
Duncan Ledwich, Yi-Chun Wu, Monica Driscoll, Ding Xue Analysis of programmed cell death in the nematode Caenorhabditis elegans (2000) 10.1016/S0076-6879(00)22009-0
This method is based, with permission, on an original protocol available here.